How To Group Rows In Excel With Collapsible Buttons
How To Group Rows In Excel With Collapsible Buttons - There are a lot of affordable templates out there, but it can be easy to feel like a lot of the best cost a amount of money, require best special design template. Making the best template format choice is way to your template success. And if at this time you are looking for information and ideas regarding the How To Group Rows In Excel With Collapsible Buttons then, you are in the perfect place. Get this How To Group Rows In Excel With Collapsible Buttons for free here. We hope this post How To Group Rows In Excel With Collapsible Buttons inspired you and help you what you are looking for.
Grouping Rows in Excel with Collapsible Buttons
Excel’s grouping feature provides a powerful way to organize and manage large datasets. It allows you to collapse and expand sections of your spreadsheet, making it easier to focus on specific areas and analyze trends without being overwhelmed by the sheer volume of data. This feature utilizes collapsible buttons (often represented as plus and minus signs) to control the visibility of grouped rows or columns.
Understanding Grouping Concepts
At its core, grouping involves designating a set of contiguous rows (or columns) as a unit. Once grouped, you can collapse the group to hide the individual rows/columns, displaying only a summary or outline level. Expanding the group reveals all the hidden rows/columns. This is particularly useful for:
- Summarizing Data: Group detail rows under a header row that presents a summarized value (e.g., sales totals for a region, expense summaries for a department).
- Improving Readability: Collapse less relevant sections to focus on the data you need.
- Creating Reports and Dashboards: Develop interactive reports where users can drill down into specific areas of interest.
- Managing Large Datasets: Navigate and analyze massive spreadsheets more efficiently.
Step-by-Step Guide to Grouping Rows
- Select the Rows to Group:
- Identify the rows you want to include in a group. These rows should be contiguous (next to each other).
- Click and drag your mouse over the row numbers on the left side of the worksheet to select the desired rows. Alternatively, you can click on the first row number, hold down the Shift key, and click on the last row number.
- Access the Grouping Feature:
- Go to the “Data” tab in the Excel ribbon.
- In the “Outline” group (usually located towards the right side of the ribbon), click the “Group” button.
- A dropdown menu will appear. Choose “Group”.
- Observe the Result:
- Excel will add a line to the left of the grouped rows. This line represents the group.
- A small minus sign (-) button will appear above the line. This is the collapse button.
- Clicking the minus sign will collapse the group, hiding the selected rows. The button will change to a plus sign (+), indicating that the group can be expanded.
- Clicking the plus sign will expand the group, revealing the hidden rows.
Ungrouping Rows
If you need to remove a grouping, follow these steps:
- Select the Grouped Rows: Select all the rows that are currently part of the group you want to remove.
- Access the Ungrouping Feature:
- Go to the “Data” tab in the Excel ribbon.
- In the “Outline” group, click the “Ungroup” button.
- A dropdown menu will appear. Choose “Ungroup”.
- Verify the Removal: The line and the +/- button will disappear, indicating that the grouping has been removed.
Nested Grouping (Creating Hierarchies)
Excel allows you to create nested groups, forming a hierarchical structure within your data. This is useful for complex datasets with multiple levels of summarization.
- Create the First Level Group: Group a set of rows as described above. This will be your outer group.
- Create the Second Level Group (and Subsequent Levels):
- Select a subset of rows within the *already grouped* rows that you want to group further.
- Go to the “Data” tab, “Outline” group, and click the “Group” button. Choose “Group”.
- Excel will create a second level group within the first level group. Another line and +/- button will appear at a further indent.
- Collapse and Expand Nested Groups: You can now collapse and expand each level of the hierarchy independently. This provides a very granular level of control over the visibility of your data.
Clearing All Outlines
If you have multiple groupings and want to remove them all at once, use the “Clear Outline” option.
- Go to the “Data” tab in the Excel ribbon.
- In the “Outline” group, click the small arrow in the lower right corner. This will open the “Settings” dialog box (or Options depending on your Excel version).
- Click “Clear Outline” from the “Outline” group. All groupings will be removed from the worksheet.
Tips and Best Practices
- Plan Your Grouping Structure: Before you start grouping, think about the logical structure of your data and how you want to summarize it. Planning ahead will make the process more efficient.
- Use Header Rows: Always include header rows above your grouped data to provide context and summaries. Make sure the header row isn’t included in the rows selected for grouping.
- Experiment with Levels: Don’t be afraid to experiment with different levels of grouping to find the best way to present your data.
- Consider Subtotals: Excel’s Subtotal feature can automatically insert summary rows and group your data based on changes in column values. This is a quick way to create grouped reports. Select your data, go to Data Tab -> Outline -> Subtotal. Follow the prompts. Excel will sort and group your data based on a selected column and then perform an action on another column.
- Avoid Overlapping Groups: While nested grouping is powerful, avoid creating groups that overlap or are overly complex. This can make your spreadsheet difficult to understand and maintain.
- Group Columns: You can also group columns using the same principles. Select the columns you want to group and follow the same steps as for grouping rows.
- Accessibility Considerations: Ensure that your grouped spreadsheets are accessible to users with disabilities. Provide clear labels and descriptions for each group.
- Save Frequently: As with any Excel work, save your progress frequently to avoid losing your work.
- Use with Tables: The grouping functionality works well in conjunction with Excel Tables. Tables can help to automatically extend groupings as new rows are added.
Example Scenario
Imagine you have a spreadsheet with sales data for different regions. The spreadsheet contains columns for Region, Salesperson, Product, and Sales Amount.
- Group by Region: Select all the rows for a particular region (e.g., all rows for the “North” region). Group these rows. Repeat for each region. Now you can collapse and expand the sales data for each region independently.
- Add Subtotals: Use the Subtotal feature to automatically insert a summary row above each region, showing the total sales amount for that region. Excel will also group the data automatically.
- Nested Grouping (Optional): Within each region, you could further group by Salesperson, allowing you to drill down into the sales performance of individual salespeople within each region.
Conclusion
Grouping rows and columns in Excel is a valuable skill for anyone working with large datasets. By mastering this feature, you can improve the readability, organization, and analytical capabilities of your spreadsheets, ultimately saving time and increasing productivity. Understanding how to create nested groups and using best practices will help you to build robust and user-friendly reports and dashboards.
 325×261 excel collapsible rows media rpgsite from media.rpgsite.net
  661×523 create collapsible rows excel methods exceldemy from www.exceldemy.com
  768×514 create collapsible rows excel spreadcheaters from spreadcheaters.com
  944×708 excel tutorial collapsible rows excel excel from dashboardsexcel.com
  700×399 mastering excel efficiency creating collapsible rows enhanced data from enjoytechlife.com
  1200×630 excel spreadsheets create collapsible rows excel from excelspreadsheetshelp.blogspot.com
  461×622 group rows excel easy ways shortcut from exceltrick.com
  480×300 create collapsible rows excel step step guide earn from earnandexcel.com
  650×261 group collapse rows microsoft excel from www.howtogeek.com
  253×210 mastering excel group rows ease earn excel from earnandexcel.com
 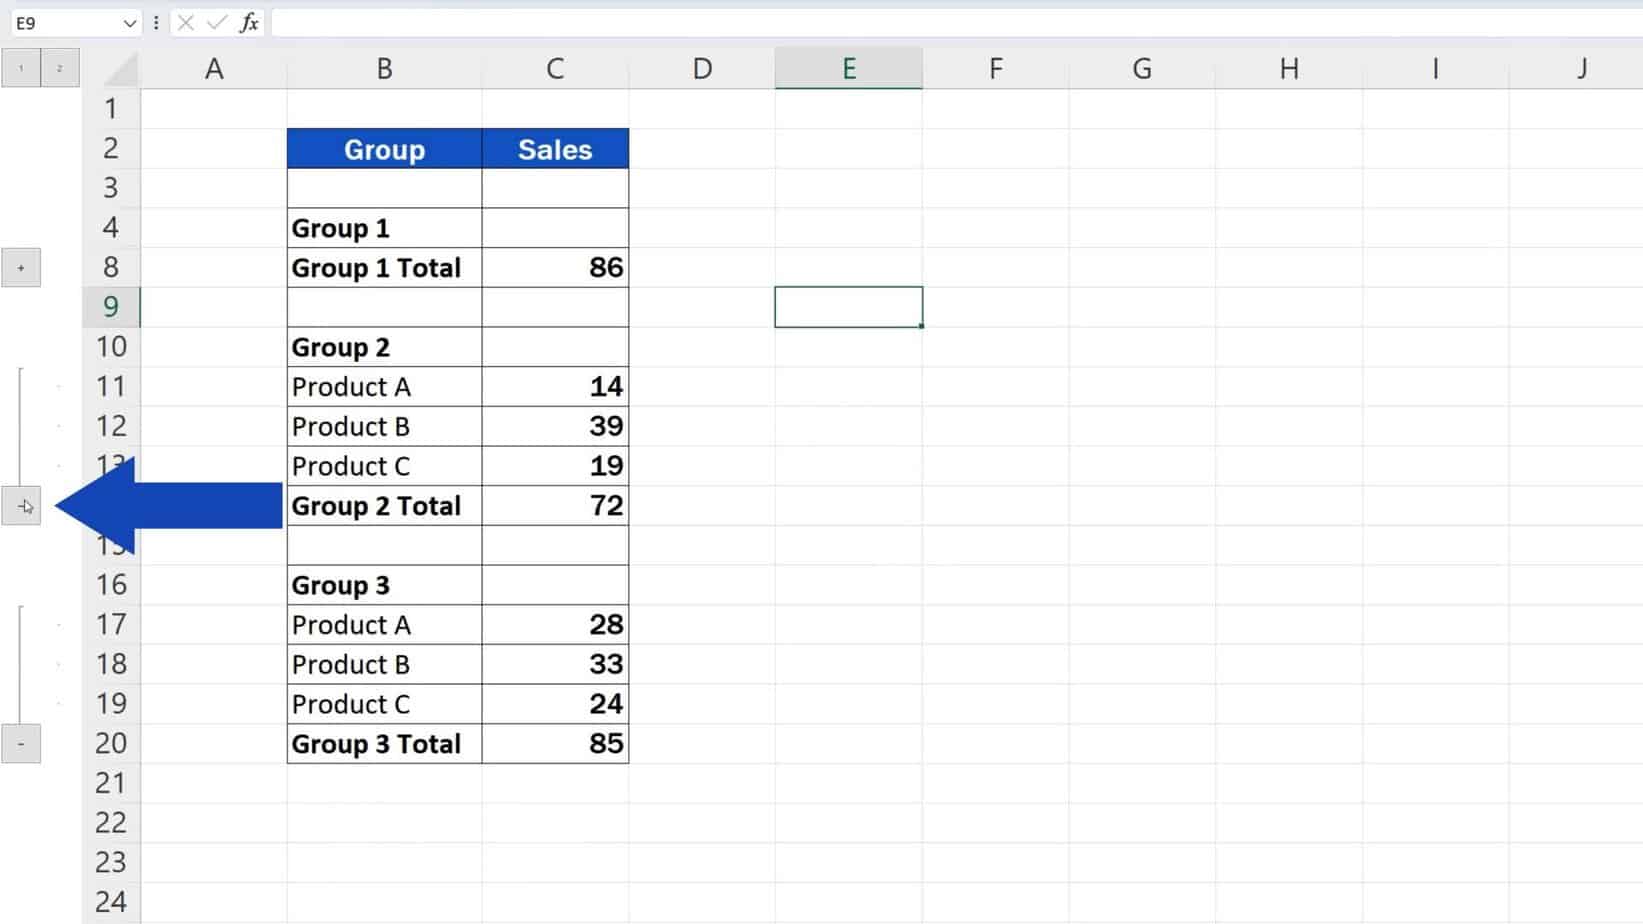 1643×924 group rows excel from www.easyclickacademy.com
  922×612 step step guide create collapsible rows excel wps office blog from www.wps.com
  1913×342 group rows excel clarity myexcelonline from www.myexcelonline.com
 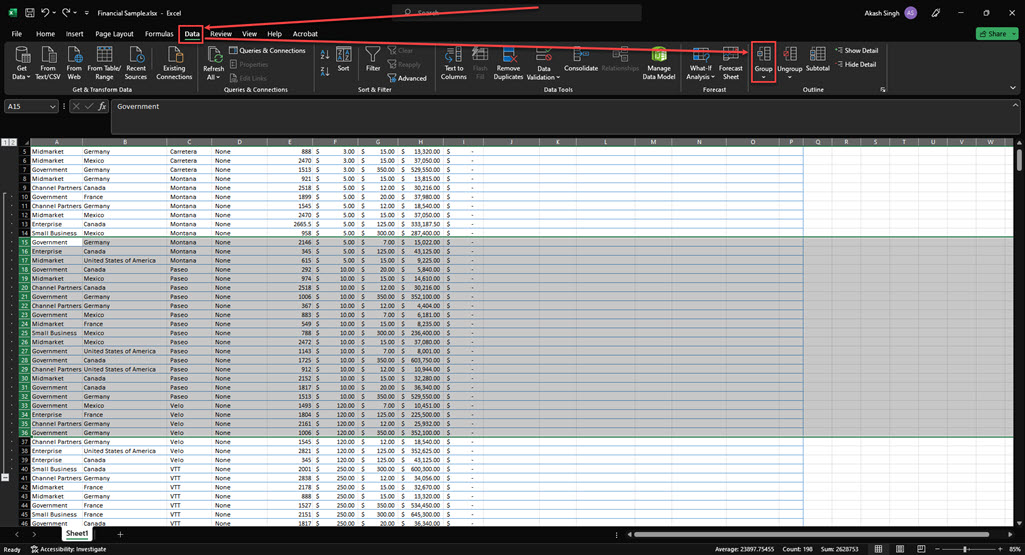 1025×555 create collapsible row excel from candid.technology
 How To Group Rows In Excel With Collapsible Buttons was posted in September 23, 2025 at 11:00 am. If you wanna have it as yours, please click the Pictures and you will go to click right mouse then Save Image As and Click Save and download the How To Group Rows In Excel With Collapsible Buttons Picture.. Don’t forget to share this picture with others via Facebook, Twitter, Pinterest or other social medias! we do hope you'll get inspired by ExcelKayra... Thanks again! If you have any DMCA issues on this post, please contact us!