How To Create Interactive Charts With Slicers And Filters In Excel
How To Create Interactive Charts With Slicers And Filters In Excel - There are a lot of affordable templates out there, but it can be easy to feel like a lot of the best cost a amount of money, require best special design template. Making the best template format choice is way to your template success. And if at this time you are looking for information and ideas regarding the How To Create Interactive Charts With Slicers And Filters In Excel then, you are in the perfect place. Get this How To Create Interactive Charts With Slicers And Filters In Excel for free here. We hope this post How To Create Interactive Charts With Slicers And Filters In Excel inspired you and help you what you are looking for.
Interactive Charts with Slicers and Filters in Excel Excel’s interactive charts empower you to visually explore your data and gain deeper insights. Combining charts with slicers and filters creates a dynamic dashboard experience, allowing users to quickly drill down and focus on specific data subsets. This guide provides a step-by-step approach to creating effective interactive charts in Excel. **1. Preparing Your Data:** The foundation of any interactive chart is well-structured data. Ensure your data meets the following criteria: * **Organized in a Table:** Excel Tables offer numerous advantages for dynamic charts. To convert your data range into a table, select the entire range and go to *Insert > Table*. Check the “My table has headers” box if your data includes header rows. Excel Tables automatically adjust formulas and charts as data is added or removed. * **Consistent Data Types:** Ensure each column contains data of the same type (e.g., numbers, dates, text). Inconsistent data types can lead to errors in calculations and charting. * **Clear Header Rows:** Header rows should clearly label each column, as these labels will be used in slicers and chart elements. * **Avoid Blank Rows/Columns:** Blank rows or columns within your data range can disrupt data analysis and chart creation. **2. Creating the Chart:** Once your data is properly formatted, you can create the chart: * **Select Data:** Choose the columns you want to display in your chart. Consider the type of data and the message you want to convey when selecting the appropriate chart type. * **Insert Chart:** Go to *Insert > Charts* and choose a chart type (e.g., Column, Bar, Line, Pie, Scatter). Excel provides chart recommendations based on your selected data. Common choices include: * **Column/Bar Charts:** Ideal for comparing values across categories. * **Line Charts:** Effective for visualizing trends over time. * **Pie Charts:** Show proportions of a whole. *Use sparingly; they can be difficult to interpret with many categories.* * **Scatter Charts:** Display the relationship between two numerical variables. * **Chart Design:** Excel’s *Chart Design* tab offers tools to customize the chart’s appearance. You can quickly apply pre-designed chart styles, change the chart type, add or remove chart elements (e.g., axis titles, data labels, legend), and modify the data source. **3. Adding Slicers:** Slicers provide an intuitive way to filter data interactively. They are essentially visual filters: * **Select the Table:** Click anywhere within your Excel Table. * **Insert Slicer:** Go to *Table Design > Tools > Insert Slicer*. * **Choose Slicer Fields:** A dialog box will appear listing the column headers of your table. Select the fields you want to use as slicers. For example, if your data includes regions, product categories, and years, you might create slicers for each of these. * **Position and Style Slicers:** Drag and resize the slicers to arrange them around your chart. Use the *Slicer Tools > Options* tab to customize the slicer’s appearance, including the number of columns, button size, and color scheme. Choose colors that complement your chart and overall dashboard design. **4. Connecting Slicers to Multiple Charts (Report Connections):** To truly make your dashboard interactive, connect your slicers to multiple charts or pivot tables. This allows a single slicer selection to filter all connected visuals simultaneously. * **Select a Slicer:** Click on the slicer you want to connect. * **Report Connections:** Go to *Slicer Tools > Options > Report Connections*. * **Check the Connections:** A dialog box will show a list of PivotTables and Tables within your workbook. Check the boxes next to the Tables that feed your other charts or PivotTables to connect them to the selected slicer. Click “OK.” * **Repeat:** Repeat this process for each slicer, connecting it to all relevant charts and PivotTables. **5. Using Filters (Alternative or Complement to Slicers):** While slicers provide a visual filtering experience, standard filters within Excel Tables can also be used to create interactive charts. * **Access Filter Dropdowns:** Each column header in an Excel Table has a filter dropdown arrow. * **Filter Options:** Click the dropdown arrow to access various filtering options, including: * **Text Filters:** Filter by specific text, contains, begins with, ends with, etc. * **Number Filters:** Filter by specific values, greater than, less than, between, etc. * **Date Filters:** Filter by specific dates, date ranges, before, after, etc. * **Color Filters:** If your data contains cells with different fill colors or font colors, you can filter based on these colors. * **Filter Effects on Charts:** Filters applied through the dropdowns directly affect the data displayed in the chart, creating interactivity. Unlike Slicers, these filters are directly linked to the dataset. **6. Enhancing Interactivity and User Experience:** * **Clear Filter Indicators:** Excel visually indicates when a filter is applied to a column. Ensure users can easily identify filtered columns and understand the applied criteria. * **”Clear Filters” Option:** Provide a clear way for users to reset all filters. This can be achieved through a button with a macro or by instructing users to use the “Clear Filter From…” option in each filter dropdown. * **Descriptive Labels and Titles:** Use clear and concise labels and titles for your charts and slicers. This helps users understand the purpose of each element and how to interact with them. * **Tooltips:** Use chart tooltips to display additional information about data points when the user hovers over them. This provides more context and allows for deeper data exploration. * **Color Consistency:** Use consistent color schemes across your charts and slicers to create a visually appealing and cohesive dashboard. * **Testing and Refinement:** Test your interactive charts thoroughly with different data scenarios and user interactions. Refine the chart design, slicer layout, and filtering options based on feedback and observations. **7. Considerations for Performance:** * **Large Datasets:** Interactive charts with slicers and filters can become slow with very large datasets. Consider using PivotTables as an intermediary step to aggregate the data before creating the chart. PivotTables are optimized for handling large datasets and can significantly improve performance. * **Formula Complexity:** Complex formulas that recalculate frequently can also impact performance. Minimize the use of volatile functions (e.g., `NOW()`, `TODAY()`, `RAND()`) and optimize formula calculations where possible. * **File Size:** Large Excel files with numerous charts and slicers can become cumbersome. Consider breaking down your data into smaller files or using data compression techniques to reduce file size. **Example Scenario:** Imagine a dataset containing sales data for a company with columns for *Date*, *Region*, *Product Category*, *Salesperson*, and *Revenue*. You could create a column chart showing total revenue by region. You could then add slicers for *Region*, *Product Category*, and *Salesperson*. By selecting different combinations of slicer values, users can quickly see the revenue performance for specific regions, product categories, and salespersons. For example, a user could easily filter the chart to show only the revenue for the “East” region, “Electronics” product category, and “John Doe” salesperson. By following these steps and considering the tips provided, you can create powerful and interactive charts in Excel that empower users to explore their data and gain valuable insights. Remember to prioritize clear data presentation, intuitive user interaction, and performance optimization for an effective and engaging data exploration experience.
 658×406 excel create interactive charts excel tips mrexcel publishing from www.mrexcel.com
  474×314 create dynamic interactive charts excel from www.extendoffice.com
  370×450 simple interactive charts excel peltier tech from peltiertech.com
 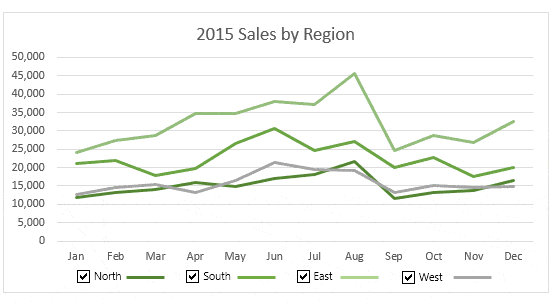 557×303 interactive excel charts training hub from www.myonlinetraininghub.com
  515×319 creating interactive charts slicers simply excel from simplyexcelcoza.weebly.com
  729×768 excel challenge slicers dynamically filter chart excel from www.exceldashboardtemplates.com
  509×503 slicer controlled interactive excel charts from www.myonlinetraininghub.com
 How To Create Interactive Charts With Slicers And Filters In Excel was posted in November 23, 2025 at 7:50 pm. If you wanna have it as yours, please click the Pictures and you will go to click right mouse then Save Image As and Click Save and download the How To Create Interactive Charts With Slicers And Filters In Excel Picture.. Don’t forget to share this picture with others via Facebook, Twitter, Pinterest or other social medias! we do hope you'll get inspired by ExcelKayra... Thanks again! If you have any DMCA issues on this post, please contact us!