Automated Invoice Template Excel With VAT Calculations
Automated Invoice Template Excel With VAT Calculations - There are a lot of affordable templates out there, but it can be easy to feel like a lot of the best cost a amount of money, require best special design template. Making the best template format choice is way to your template success. And if at this time you are looking for information and ideas regarding the Automated Invoice Template Excel With VAT Calculations then, you are in the perfect place. Get this Automated Invoice Template Excel With VAT Calculations for free here. We hope this post Automated Invoice Template Excel With VAT Calculations inspired you and help you what you are looking for.
Automated Invoice Template in Excel with VAT Calculations Creating invoices can be a time-consuming and repetitive task, especially when dealing with VAT (Value Added Tax). An automated invoice template in Excel can streamline this process, minimizing errors and saving valuable time. This guide will walk you through creating such a template, incorporating VAT calculations and other essential features. **Understanding the Requirements** Before diving into the Excel template, let’s outline the key elements required in a professional invoice: * **Invoice Header:** * Your Company Name and Logo * Your Company Address and Contact Information * Invoice Number (generated sequentially) * Invoice Date * Customer’s Company Name * Customer’s Address * **Invoice Body:** * Description of Goods or Services * Quantity * Unit Price * Line Total (Quantity * Unit Price) * **Invoice Footer:** * Subtotal (Sum of all Line Totals) * VAT Rate (%) – A dropdown menu for different VAT rates (e.g., 0%, 5%, 20%) * VAT Amount (Calculated based on Subtotal and VAT Rate) * Total Amount Due (Subtotal + VAT Amount) * **Payment Terms:** * Payment Due Date * Payment Methods (e.g., Bank Transfer, Credit Card) * Bank Account Details (Account Name, Account Number, Sort Code/Routing Number) * **Other Information (Optional):** * Purchase Order Number * Shipping Details * Notes or Special Instructions **Building the Invoice Template in Excel** 1. **Setting Up the Worksheet:** * Open a new Excel workbook. * Rename the first sheet to “Invoice.” * Adjust column widths to accommodate different data types (e.g., wider column for description). 2. **Creating the Invoice Header:** * In the top left corner (e.g., A1), add your company logo (Insert > Pictures > This Device). Resize it as needed. * Below the logo, or to its right, input your company name, address, phone number, and email address. * In a designated area (e.g., E1), add “Invoice Number:” and next to it (e.g., F1), use a formula to automatically generate the invoice number. We’ll discuss invoice number generation later. * Below the Invoice Number, add “Invoice Date:” (e.g., E2) and use the `TODAY()` function to display the current date (e.g., F2). * For Customer Details, add labels like “Customer Name:” (e.g., A7), “Customer Address:” (e.g., A8), and provide corresponding input cells (e.g., B7, B8). 3. **Designing the Invoice Body (Table):** * Start creating the table header in a row (e.g., A12): * **Column A:** “Item Description” * **Column B:** “Quantity” * **Column C:** “Unit Price” * **Column D:** “Line Total” * Enter some sample data rows below the header (e.g., A13 onwards) to visualize the table. * Format the table using Excel’s table features (Home > Format as Table). This makes it easier to add or remove rows later. * In the “Line Total” column (Column D), enter the formula to calculate the line total: `=B13*C13` (assuming the first data row starts at row 13). Drag this formula down to apply it to all rows in the table. 4. **Creating the Invoice Footer (Calculations):** * Below the table (leave some blank rows for visual separation), add the following labels: * “Subtotal:” (e.g., A25) * “VAT Rate:” (e.g., A26) * “VAT Amount:” (e.g., A27) * “Total Amount Due:” (e.g., A28) * In the cell next to “Subtotal:” (e.g., B25), use the `SUM` function to calculate the subtotal of all line totals: `=SUM(D13:D22)` (adjust the range D13:D22 to match the actual range of your Line Total column in the table). Consider using a dynamic range formula here using INDEX and COUNTA to accommodate varying numbers of invoice lines. * For “VAT Rate:” (e.g., B26), create a dropdown list using Data Validation (Data > Data Validation). * Allow: List * Source: Enter your desired VAT rates separated by commas (e.g., “0%,5%,20%”). * Alternatively, you can create a separate sheet (“VATRates”) containing the VAT rates in a column, and then refer to that column in the Data Validation Source field. This makes it easier to update the VAT rates later. * Next to “VAT Amount:” (e.g., B27), use a formula to calculate the VAT amount based on the Subtotal and the selected VAT Rate. The formula will need to convert the percentage string from the VAT Rate dropdown into a decimal number. This can be achieved with the VALUE and SUBSTITUTE functions. For example: `=B25*VALUE(SUBSTITUTE(B26,”%”,””))/100`. * Finally, next to “Total Amount Due:” (e.g., B28), calculate the total amount due by adding the Subtotal and the VAT Amount: `=B25+B27`. 5. **Adding Payment Terms:** * Below the invoice footer, add labels for “Payment Due Date:”, “Payment Methods:”, and “Bank Account Details:”. * Provide corresponding input cells for entering the payment due date, payment methods, and bank account information. 6. **Automating Invoice Number Generation:** * **Method 1: Using a Simple Counter (Not ideal for multi-user environments):** * In a hidden cell (e.g., Z1), store the last invoice number used. * In the cell where you want to display the invoice number (e.g., F1), use the following formula: `=Z1+1`. * To update the counter after printing or saving the invoice, you would need to manually update cell Z1 with the new invoice number. This is prone to errors and not suitable for multiple users accessing the same file. * **Method 2: Using a Worksheet Change Event (Requires VBA):** * Open the VBA editor (Alt + F11). * In the Project Explorer, double-click on the sheet name (“Invoice”). * Paste the following VBA code: “`vba Private Sub Worksheet_Change(ByVal Target As Range) Dim InvoiceNumberCell As Range Dim CounterCell As Range ‘ Set the range for the invoice number cell (e.g., F1) Set InvoiceNumberCell = Range(“F1”) ‘ Set the range for the counter cell (e.g., Z1) Set CounterCell = Range(“Z1”) ‘ Check if the Invoice Number cell has been changed manually If Not Intersect(Target, InvoiceNumberCell) Is Nothing Then ‘ Do nothing if the Invoice Number cell was changed directly. Exit Sub End If ‘ Check if the Customer Name cell has been changed. If so, increment the invoice number If Not Intersect(Target, Range(“B7”)) Is Nothing Then ‘Adjust “B7” to your Customer Name Cell Application.EnableEvents = False ‘ Prevent triggering the event again ‘Check to see if counter cell is populated or not If IsEmpty(CounterCell) Then CounterCell.Value = 1 InvoiceNumberCell.Value = CounterCell.Value Else CounterCell.Value = CounterCell.Value + 1 InvoiceNumberCell.Value = CounterCell.Value End If Application.EnableEvents = True ‘ Re-enable events End If End Sub “` * Adjust the `Range(“B7”)` (customer name cell), `Range(“F1”)` (Invoice Number Cell) and `Range(“Z1”)` (Counter Cell) values in the code to match your worksheet. * This code automatically increments the invoice number in cell F1 whenever the Customer Name (cell B7) is changed. The counter is stored in cell Z1. * **Method 3: Using a Table and `MAX` function (More robust):** * Create a new sheet named “InvoiceNumbers”. * In the first column (A), create a table named “InvoiceNumberTable”. * In the first cell of the table (A1), enter “InvoiceNumber”. * In the “Invoice” sheet, in the cell where you want to display the invoice number (e.g., F1), use the following formula: `=MAX(InvoiceNumberTable[InvoiceNumber])+1`. * After saving the invoice, you need to add the newly generated invoice number to the “InvoiceNumberTable” table in the “InvoiceNumbers” sheet. You can manually enter it or use VBA code to automate this process. The VBA code would be triggered by a “Save Invoice” button click or similar event. This method is more robust because it stores all the used invoice numbers in a table, preventing duplicates and allowing for easier tracking. It does require more setup and VBA to be fully automated. **Important Considerations:** * **Formatting:** Use appropriate number formats for currency, percentages, and dates. Apply borders, shading, and fonts to make the invoice visually appealing and professional. * **Printing:** Set the print area (Page Layout > Print Area) to include only the relevant parts of the invoice. Preview the print output to ensure it looks correct. * **Data Validation:** Use data validation to restrict input to specific formats and values, reducing errors. * **Protection:** Protect the worksheet (Review > Protect Sheet) to prevent accidental changes to formulas and formatting. However, ensure the input cells (customer details, quantity, unit price) are *unlocked* before protecting the sheet. * **Saving as Template:** Save the file as an Excel Template (.xltx) so you can easily create new invoices from it without modifying the original template. * **Error Handling:** Consider adding error handling to prevent unexpected results (e.g., what happens if the user enters text in the quantity or unit price field?). * **VBA Security:** If you use VBA code, ensure your Excel security settings allow macros to run. Digitally signing the VBA code is recommended. * **Legality:** Consult with an accountant or legal professional to ensure your invoice template complies with all applicable VAT regulations and local laws. **Example VAT Calculation Scenarios:** * **No VAT:** If the VAT rate is set to 0%, the VAT amount will be zero, and the Total Amount Due will be equal to the Subtotal. * **Standard VAT Rate:** If the VAT rate is set to 20%, the VAT amount will be 20% of the Subtotal, and the Total Amount Due will be the Subtotal plus the VAT amount. * **Reduced VAT Rate:** Some goods or services may be subject to a reduced VAT rate (e.g., 5%). The template should correctly calculate the VAT amount based on the selected rate. **Testing and Refinement:** Thoroughly test the template with different scenarios and VAT rates to ensure it is accurate and reliable. Refine the design and functionality based on your specific needs and feedback. Consider usability: does the template flow logically for the user? By following these steps, you can create an automated invoice template in Excel that simplifies your invoicing process, improves accuracy, and saves you valuable time. Remember to regularly back up your template and keep it updated with any changes in VAT regulations. Remember to be extremely careful when using VBA macros with spreadsheets, as they can be vulnerable to malicious code. Using data validation, conditional formatting, and formula auditing can significantly improve the robustness and security of your spreadsheet.
 1280×900 vat spreadsheet template irish sales vat invoice template from db-excel.com
  740×816 automated excel invoice template adnia solutions from adniasolutions.com
  728×1109 vat spreadsheet template uk vat invoice template from db-excel.com
  601×853 vat spreadsheet template construction invoice from db-excel.com
 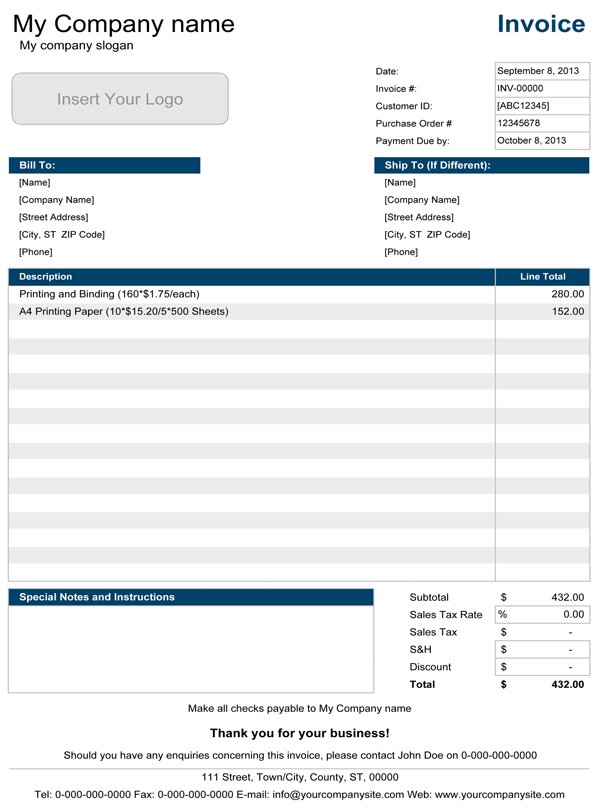 600×812 vat invoice template uk excel cards design templates from legaldbol.com
  744×993 uk vat invoice template excel cards design templates from legaldbol.com
  800×922 vat invoice template excel cards design templates from legaldbol.com
  698×1167 vat spreadsheet template vat sales invoice template price from db-excel.com
  712×1094 uae vat invoice template excel cards design templates from legaldbol.com
  800×1013 uk vat invoice excel template exceldatapro from exceldatapro.com
  1280×768 vat spreadsheet template db excelcom from db-excel.com
  625×823 vat invoice template sample form excel word from www.myaccountingcourse.com
 Automated Invoice Template Excel With VAT Calculations was posted in January 7, 2026 at 3:50 am. If you wanna have it as yours, please click the Pictures and you will go to click right mouse then Save Image As and Click Save and download the Automated Invoice Template Excel With VAT Calculations Picture.. Don’t forget to share this picture with others via Facebook, Twitter, Pinterest or other social medias! we do hope you'll get inspired by ExcelKayra... Thanks again! If you have any DMCA issues on this post, please contact us!