How To Insert Interactive Checkboxes In Excel For Task Completion
How To Insert Interactive Checkboxes In Excel For Task Completion - There are a lot of affordable templates out there, but it can be easy to feel like a lot of the best cost a amount of money, require best special design template. Making the best template format choice is way to your template success. And if at this time you are looking for information and ideas regarding the How To Insert Interactive Checkboxes In Excel For Task Completion then, you are in the perfect place. Get this How To Insert Interactive Checkboxes In Excel For Task Completion for free here. We hope this post How To Insert Interactive Checkboxes In Excel For Task Completion inspired you and help you what you are looking for.
“`html
Inserting Interactive Checkboxes in Excel for Task Completion
Excel, while often associated with number crunching, can be a surprisingly versatile tool for project management and task tracking. One of its most useful, yet often overlooked features, is the ability to insert interactive checkboxes. These checkboxes provide a visual and engaging way to mark tasks as complete, offering a clear overview of progress and enhancing overall organization. This guide will walk you through the process of inserting and linking checkboxes to cells, along with advanced techniques to improve your task management system in Excel.
Enabling the Developer Tab
Before you can insert checkboxes, you need to enable the Developer tab in Excel. This tab is hidden by default but contains all the tools needed to work with form controls, including checkboxes.
- Go to File > Options.
- In the Excel Options dialog box, select Customize Ribbon.
- On the right-hand side, under the Customize the Ribbon section, find Developer in the list.
- Check the box next to Developer and click OK.
The Developer tab should now appear on your Excel ribbon.
Inserting Checkboxes
With the Developer tab enabled, you can now insert checkboxes into your worksheet.
- Go to the Developer tab.
- In the Controls group, click Insert.
- Under Form Controls, select the Checkbox icon (the first icon in the top row).
- Click and drag on the worksheet to draw the checkbox.
You have now inserted your first checkbox. Repeat this process to add checkboxes to all the rows corresponding to your tasks.
Customizing Checkbox Text
By default, the checkbox will likely have text associated with it (e.g., “Check Box 1”). You’ll want to customize this text to remove it or make it relevant to the specific task.
- Right-click on the checkbox you want to edit.
- Select Edit Text.
- Delete the default text, or replace it with text that reflects the task. If you want no text, simply delete everything.
- Click anywhere outside the checkbox to finish editing.
Linking Checkboxes to Cells
The true power of checkboxes comes from linking them to cells. This allows you to use the checkbox value (TRUE when checked, FALSE when unchecked) in formulas and conditional formatting.
- Right-click on the checkbox you want to link.
- Select Format Control.
- In the Format Control dialog box, go to the Control tab.
- In the Cell link field, enter the cell you want to link the checkbox to (e.g., A1). You can also click the button next to the field and then click on the desired cell on the worksheet.
- Click OK.
Now, when you check the checkbox, the linked cell will display TRUE. When you uncheck it, the cell will display FALSE.
Using Linked Cells for Task Completion Indication
With the checkboxes linked to cells, you can now use these linked cells to visually indicate task completion. Conditional formatting is an excellent tool for this purpose.
- Select the range of cells containing your task descriptions (e.g., B1:B10).
- Go to the Home tab.
- In the Styles group, click Conditional Formatting > New Rule.
- In the New Formatting Rule dialog box, select Use a formula to determine which cells to format.
- In the Format values where this formula is true field, enter a formula that refers to the linked cell. For example, if your linked cell for the first task is A1, enter
=A1=TRUE. - Click the Format button.
- Choose the formatting you want to apply when the task is complete (e.g., a green background, a strikethrough font).
- Click OK twice to close the dialog boxes.
Now, when you check the checkbox for a task, the corresponding cell containing the task description will be formatted to indicate completion (e.g., a strikethrough will appear). You can customize the formatting to suit your preferences.
Creating a Progress Bar
To provide a visual representation of overall progress, you can create a progress bar using formulas and conditional formatting.
- In a cell (e.g., C1), enter a formula to calculate the percentage of completed tasks. For example, if your linked cells are A1:A10, use the following formula:
=COUNTIF(A1:A10,TRUE)/COUNT(A1:A10). Format the cell as a percentage. - Select the cell containing the percentage (e.g., C1).
- Go to the Home tab.
- In the Styles group, click Conditional Formatting > Data Bars.
- Choose a data bar style.
The cell will now display a progress bar that visually represents the percentage of completed tasks. You can further customize the data bar appearance by going to Conditional Formatting > Manage Rules and editing the data bar rule.
Copying and Pasting Checkboxes
Instead of manually inserting each checkbox, you can copy and paste an existing checkbox. However, be cautious as copying the checkbox will also copy the *linked cell* if you simply copy the cell containing the checkbox. To avoid this, follow these steps for better control over copying:
- Select the checkbox you want to copy.
- Press Ctrl+C (or Cmd+C on a Mac) to copy the checkbox.
- Select the cell where you want to paste the checkbox.
- Right-click and choose Paste Special.
- In the Paste Special dialog, select All using Source theme. This should paste only the checkbox itself and preserve its formatting without copying the underlying linked cell value.
You’ll still need to link each pasted checkbox to its corresponding cell.
Dynamically Changing Task Status
If you want to automatically update the task status (e.g., “Complete,” “Incomplete”) based on the checkbox value, you can use an IF formula.
- In a cell next to the task description (e.g., C1), enter the following formula, replacing A1 with the appropriate linked cell:
=IF(A1=TRUE,"Complete","Incomplete") - Copy this formula down to the other tasks.
The cell will now display “Complete” when the checkbox is checked and “Incomplete” when it is unchecked.
Grouping Checkboxes (Advanced)
For very large lists, consider grouping checkboxes to improve performance and reduce file size. This involves using VBA (Visual Basic for Applications), but is beyond the scope of a basic guide. However, keep in mind that excessive use of form controls without optimization can impact Excel’s performance.
Troubleshooting
- Checkbox doesn’t appear: Ensure the Developer tab is enabled. Also, make sure the checkbox is not hidden behind other objects.
- Checkbox is not linked correctly: Double-check the cell link in the Format Control dialog box. Ensure the cell reference is accurate.
- Conditional formatting is not working: Verify the formula in the conditional formatting rule is correct and refers to the linked cell.
- Performance issues: Reduce the number of form controls if you experience slow performance. Consider using alternative methods for large datasets.
Conclusion
Inserting interactive checkboxes in Excel is a simple yet powerful way to enhance task management and track progress. By linking checkboxes to cells, applying conditional formatting, and creating progress bars, you can transform your spreadsheets into visually appealing and highly functional project management tools. Remember to customize these techniques to suit your specific needs and project requirements. With a little practice, you’ll be able to create dynamic and efficient task tracking systems that improve your overall organization and productivity.
“`
 740×356 insert checkbox excel easy step step guide from trumpexcel.com
  452×398 insert checkbox excel from www.repairmsexcel.com
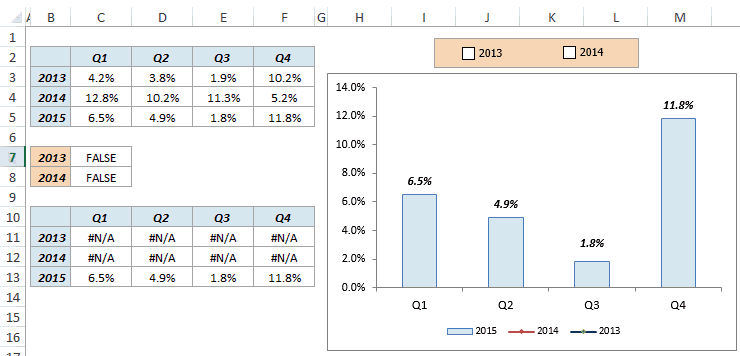
  695×251 create interactive chart series selection checkbox excel from www.extendoffice.com
  584×362 insert checkbox excel from www.exceltrick.com
  1480×588 insert checkbox excel jotform blog from www.jotform.com
 How To Insert Interactive Checkboxes In Excel For Task Completion was posted in November 20, 2025 at 5:17 am. If you wanna have it as yours, please click the Pictures and you will go to click right mouse then Save Image As and Click Save and download the How To Insert Interactive Checkboxes In Excel For Task Completion Picture.. Don’t forget to share this picture with others via Facebook, Twitter, Pinterest or other social medias! we do hope you'll get inspired by ExcelKayra... Thanks again! If you have any DMCA issues on this post, please contact us!