How To Sort Data In Excel With Multiple Conditions
How To Sort Data In Excel With Multiple Conditions - There are a lot of affordable templates out there, but it can be easy to feel like a lot of the best cost a amount of money, require best special design template. Making the best template format choice is way to your template success. And if at this time you are looking for information and ideas regarding the How To Sort Data In Excel With Multiple Conditions then, you are in the perfect place. Get this How To Sort Data In Excel With Multiple Conditions for free here. We hope this post How To Sort Data In Excel With Multiple Conditions inspired you and help you what you are looking for.
Sorting Data in Excel with Multiple Conditions
Excel’s sorting capabilities extend far beyond simply ordering a single column. You can leverage its powerful multi-level sorting feature to organize your data based on several conditions, prioritizing them in a specific order. This allows for granular control over how your information is presented and analyzed, making it easier to identify trends, patterns, and outliers. This document will guide you through the process of sorting data with multiple criteria in Excel.
Understanding the Importance of Multi-Level Sorting
Imagine you have a spreadsheet containing sales data with columns for Region, Product Category, and Sales Amount. Sorting solely by Region might group regions together, but it won’t reveal which product category performs best in each region. Sorting only by Sales Amount would show you the top-selling items overall, but not necessarily within a specific category or region. Multi-level sorting allows you to sort first by Region, then within each region by Product Category, and finally by Sales Amount. This provides a much more comprehensive view of your sales data, enabling you to answer questions like: “Which product category has the highest sales in the East region?”
Accessing the Sort Dialog Box
The primary method for sorting with multiple conditions in Excel is through the Sort dialog box. Here’s how to access it:
- Select the Data Range: First, select the range of cells you want to sort. Be sure to include column headers in your selection; Excel uses these headers to identify the columns you want to sort by. If your data has column headers, ensure the “My data has headers” checkbox is selected in the Sort dialog box. If you do not have column headers, uncheck this box, and Excel will use column letters (A, B, C…) instead.
- Navigate to the Sort Feature: Go to the “Data” tab on the Excel ribbon. In the “Sort & Filter” group, click the “Sort” button. This will open the Sort dialog box.
Configuring the Sort Criteria
The Sort dialog box is where you define the sorting rules. It allows you to add multiple levels of sorting, each with its own criteria.
- First Sort Level: The first row in the Sort dialog box represents the primary sorting condition.
- Column: In the “Column” dropdown, select the column you want to sort by first. This is the most important criterion. The dropdown will list the header names if the “My data has headers” box is checked or column letters (A, B, C…) if it’s unchecked.
- Sort On: The “Sort On” dropdown typically defaults to “Values,” which sorts based on the cell values. However, you can also sort by cell color, font color, or cell icon if these are present in your data.
- Order: The “Order” dropdown specifies the sorting order. For most data types, you’ll see options like “A to Z” (ascending) or “Z to A” (descending). For numerical data, you’ll see “Smallest to Largest” or “Largest to Smallest.” For date data, you’ll see “Oldest to Newest” or “Newest to Oldest.” You can also create custom lists for sorting in a specific, non-alphabetical order (discussed later).
- Adding Subsequent Sort Levels: To add more sorting conditions, click the “Add Level” button. This will add a new row to the Sort dialog box, allowing you to specify a second sorting criterion. This second criterion will only be applied *within* each group created by the first sort level. For example, if you sort first by Region, then the second sort level will sort the data within each individual region. Repeat this process to add as many sorting levels as needed.
- Configuring Additional Sort Levels: For each added level, configure the “Column,” “Sort On,” and “Order” dropdowns as described above. Remember that each level refines the sorting within the previous level’s groups.
- Deleting Sort Levels: If you make a mistake or need to remove a sorting condition, select the row representing the level you want to remove and click the “Delete Level” button.
- Copying Sort Levels: If you want to duplicate a sort level and modify it slightly, select the row and click the “Copy Level” button. This can save you time if you have similar sorting criteria.
- Changing Sort Level Priority: The order of the sort levels is crucial. The top-most level has the highest priority. To change the order, select a level and use the up and down arrow buttons to move it up or down in the list.
Sorting with Custom Lists
Sometimes, you need to sort data based on a custom order that is not alphabetical or numerical. For example, you might want to sort a column containing priority levels (High, Medium, Low) in that specific order. Excel allows you to create custom lists for this purpose.
- Creating a Custom List: Go to “File” > “Options” > “Advanced.” Scroll down to the “General” section and click the “Edit Custom Lists…” button.
- Adding List Entries: In the Custom Lists dialog box, you can either type the list entries directly into the “List entries” box (separating each entry with a comma or pressing Enter after each entry) or import a list from a range of cells in your worksheet.
- Using the Custom List: After creating the custom list, go to the Sort dialog box and select the column you want to sort using the custom list. In the “Order” dropdown, choose “Custom List…”. In the Custom Lists dialog box, select the custom list you created and click “OK.”
Sorting by Cell Color, Font Color, or Cell Icon
As mentioned earlier, the “Sort On” dropdown allows you to sort by cell color, font color, or cell icon. This is useful if you’ve used conditional formatting to highlight specific data points.
- Select the Column: In the Sort dialog box, select the column containing the formatting you want to sort by.
- Choose the “Sort On” Option: In the “Sort On” dropdown, choose “Cell Color,” “Font Color,” or “Cell Icon,” depending on the type of formatting you want to sort by.
- Specify the Color or Icon: A new dropdown will appear, allowing you to select the specific cell color, font color, or cell icon you want to prioritize. You can also specify whether you want to put cells with that formatting “On Top” or “On Bottom.”
Considerations and Best Practices
- Data Consistency: Ensure your data is consistent. Inconsistent data (e.g., “USA” vs. “U.S.A.”) can lead to unexpected sorting results. Clean your data before sorting.
- Backups: It’s always a good idea to create a backup of your spreadsheet before performing any major sorting operations. This way, you can easily revert to the original data if something goes wrong.
- Column Headers: Always include column headers in your selection to make it easier to identify the columns you want to sort by.
- Understanding the Impact: Before sorting, carefully consider the impact of the sort on your data. Ensure that the relationships between the data points are maintained after sorting.
By mastering multi-level sorting in Excel, you can unlock deeper insights from your data and present it in a clear and organized manner, leading to better decision-making.
 1207×790 sort data multiple columns excelnotes from excelnotes.com
 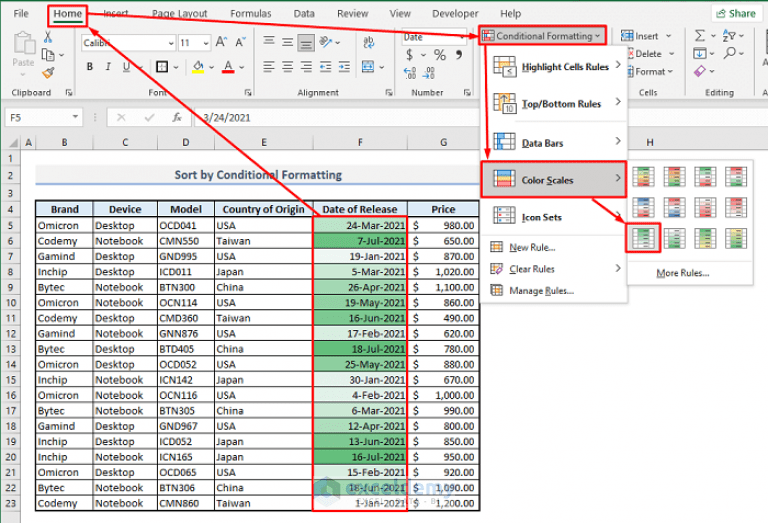 768×523 sort multiple columns excel quick approaches exceldemy from www.exceldemy.com
  1797×998 sort multiple columns excel from www.statology.org
  344×341 sort data excel step step tutorial from www.excel-easy.com
  600×275 sort multiple columns excel teachexcelcom from www.teachexcel.com
  644×455 sort multiple rows columns independently excel from www.extendoffice.com
 :max_bytes(150000):strip_icc()/ways-to-sort-data-in-excel-R5-5c17a04a46e0fb0001ebb551.jpg) 1366×721 sort data excel from www.lifewire.com
1366×721 sort data excel from www.lifewire.com  1280×600 sort data multiple columns microsoft excel microsoft from ms-office.wonderhowto.com
 How To Sort Data In Excel With Multiple Conditions was posted in November 5, 2025 at 7:51 pm. If you wanna have it as yours, please click the Pictures and you will go to click right mouse then Save Image As and Click Save and download the How To Sort Data In Excel With Multiple Conditions Picture.. Don’t forget to share this picture with others via Facebook, Twitter, Pinterest or other social medias! we do hope you'll get inspired by ExcelKayra... Thanks again! If you have any DMCA issues on this post, please contact us!