How To Create A Dropdown Calendar In Excel Without VBA
How To Create A Dropdown Calendar In Excel Without VBA - There are a lot of affordable templates out there, but it can be easy to feel like a lot of the best cost a amount of money, require best special design template. Making the best template format choice is way to your template success. And if at this time you are looking for information and ideas regarding the How To Create A Dropdown Calendar In Excel Without VBA then, you are in the perfect place. Get this How To Create A Dropdown Calendar In Excel Without VBA for free here. We hope this post How To Create A Dropdown Calendar In Excel Without VBA inspired you and help you what you are looking for.
“`html
Creating a Dropdown Calendar in Excel Without VBA
While creating a true, fully interactive calendar directly within an Excel cell without using VBA (Visual Basic for Applications) is impossible, we can simulate a dropdown calendar effect using a combination of data validation, named ranges, and formulas. This method provides a user-friendly way to select a date from a list, effectively mimicking a calendar selection process. This guide explains how to achieve this.
Understanding the Limitations
Before we start, it’s crucial to understand the limitations. Without VBA, we cannot create a dynamic, pop-up calendar. Instead, we will create a dropdown list of dates. This approach relies on Excel’s data validation feature, which allows us to restrict the values that can be entered into a cell to a predefined list. We need to generate this list of dates dynamically, which involves formulas and helper columns.
Steps to Create a Dropdown Calendar
- Setting up the Helper Columns and Named Ranges: This is the most important and foundational step. We’ll use helper columns to generate a list of dates.
- Creating a Dynamic Date List: Use Excel formulas to dynamically generate a list of dates based on a starting month and year.
- Defining Named Ranges: Assign names to ranges to simplify formulas and make the setup more manageable.
- Implementing Data Validation: Configure data validation to restrict the cell to accept only dates from the named range.
- Adding User Instructions: Provide clear instructions for users so they understand how to use the simulated calendar.
Detailed Instructions
1. Setting up the Helper Columns and Named Ranges
We need several columns to help generate our date list. Let’s designate columns A, B, C, and D for this purpose. These columns can be hidden later to clean up the spreadsheet’s appearance.
- Column A (Year): In cell A1, enter the year you want your calendar to start from (e.g., 2024). This cell will serve as the base year for your calendar. It can be a fixed value or linked to another cell, making it changeable.
- Column B (Month): In cell B1, enter the month you want your calendar to start from (e.g., 1 for January, 2 for February, etc.). Similar to the year, this can be a fixed value or linked to another cell.
- Column C (Date List): This column will contain the dynamically generated list of dates. This is the column that will be used for the dropdown.
- Column D (Number of Days in Month): This column calculates number of days in month
2. Creating a Dynamic Date List
Now we need to create the dynamic list of dates in Column C.
- Calculate Number of Days in Month in Column D: In cell D1, enter the following formula:
=EOMONTH(DATE(A1,B1,1),0). This formula returns the last day of the month specified by the year in A1 and the month in B1. This is equivalent to finding the number of days in the given month. - Generate Dates in Column C: In cell C1, enter the first day of the specified month:
=DATE(A1,B1,1). This will display the first date in our list. - Generate Remaining Dates: In cell C2, enter the following formula:
=IF(C1+1<=D$1,C1+1,""). This formula checks if adding 1 day to the previous date (C1) results in a date still within the same month (checking against the last day of the month calculated in D1). If it does, it adds 1 day; otherwise, it leaves the cell blank. - Drag Down the Formula: Drag the formula from C2 down a sufficient number of rows (e.g., 31 rows) to cover all possible dates in a month. Column C will now contain a list of dates, followed by blank cells. The number of blank cells will depend on the month chosen, as February will have more blanks than January or March.
3. Defining Named Ranges
Named ranges make our formulas and data validation setup more readable and maintainable.
- Select the Range of Dates: Select all the dates in Column C, including the blank cells below the last date. For instance, if you dragged the formula down to row 32, select C1:C32.
- Create a Dynamic Named Range: Go to the "Formulas" tab and click on "Define Name". In the "Name" field, enter a name for your date range, such as "DateList". In the "Refers to" field, enter the following formula:
=OFFSET(Sheet1!$C$1,0,0,COUNT(Sheet1!$C:$C),1). ReplaceSheet1with the name of your actual sheet. This `OFFSET` formula dynamically adjusts the size of the range based on the number of numerical values (dates) in column C. The `COUNT` function is used since dates are stored as numbers in excel. - Create Named Ranges for Year and Month: Create two more named ranges for the Year (A1) and Month (B1) cells. Name them "YearValue" and "MonthValue", respectively. The "Refers to" value will simply be
=Sheet1!$A$1and=Sheet1!$B$1, respectively.
4. Implementing Data Validation
Now we'll apply data validation to a cell where we want the dropdown calendar to appear.
- Select the Target Cell: Choose the cell where you want the user to select the date (e.g., E1).
- Open Data Validation: Go to the "Data" tab and click on "Data Validation".
- Configure Data Validation:
- In the "Settings" tab, under "Allow:", select "List".
- In the "Source:" field, enter
=DateList(the name of the dynamic named range you created earlier). - Optionally, in the "Input Message" tab, add a title and message to guide the user.
- Optionally, in the "Error Alert" tab, customize the error message that appears if the user enters an invalid date.
- Click "OK".
5. Adding User Instructions
To ensure ease of use, add clear instructions near the dropdown calendar.
For example, in a cell near E1 (e.g., G1), write: "Select the date from the dropdown list. To change the month or year, modify the values in cells A1 (Year) and B1 (Month)."
Enhancements and Customizations
- Hiding Helper Columns: Once everything is set up, you can hide columns A, B, C, and D to make the spreadsheet more presentable. Right-click on the column headers and select "Hide."
- Conditional Formatting: Use conditional formatting to highlight specific dates or weekends in the generated date list (Column C).
- Dynamic Year and Month Selection: Instead of manually entering the year and month in A1 and B1, you could use dropdown lists (created with data validation) for year and month selection. This would make the calendar more interactive. The source list for these dropdowns will have to be created manually.
- Error Handling: If the year and month selection result in an invalid date, implement error handling to inform the user. You can use `IFERROR` to catch potential errors in the formulas.
- Next/Previous Month Buttons: While difficult without VBA, you could simulate "next" and "previous" month buttons using formulas and linked cells. These "buttons" would simply update the month cell (B1) based on simple addition or subtraction.
Conclusion
While this method doesn't create a true, interactive calendar within an Excel cell without VBA, it provides a usable and relatively simple solution for selecting dates from a dropdown list. By combining data validation, named ranges, and dynamic formulas, you can effectively simulate a calendar selection process, making data entry easier and more accurate for your users.
```
 474×355 create drop calendar excel techwallacom from www.ehow.com
 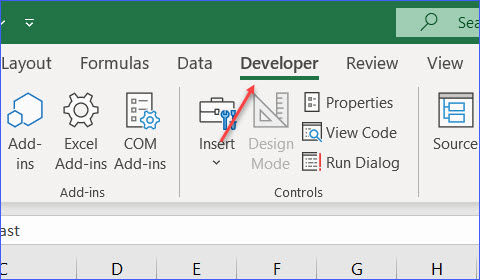 480×280 create drop calendar excel excelnotes from excelnotes.com
  1885×938 create drop calendar excel developer publish from developerpublish.com
  725×380 create drop list calendar date picker excel from www.extendoffice.com
 How To Create A Dropdown Calendar In Excel Without VBA was posted in December 26, 2025 at 7:43 pm. If you wanna have it as yours, please click the Pictures and you will go to click right mouse then Save Image As and Click Save and download the How To Create A Dropdown Calendar In Excel Without VBA Picture.. Don’t forget to share this picture with others via Facebook, Twitter, Pinterest or other social medias! we do hope you'll get inspired by ExcelKayra... Thanks again! If you have any DMCA issues on this post, please contact us!