How To Use Data Validation For Dates In Excel
How To Use Data Validation For Dates In Excel - There are a lot of affordable templates out there, but it can be easy to feel like a lot of the best cost a amount of money, require best special design template. Making the best template format choice is way to your template success. And if at this time you are looking for information and ideas regarding the How To Use Data Validation For Dates In Excel then, you are in the perfect place. Get this How To Use Data Validation For Dates In Excel for free here. We hope this post How To Use Data Validation For Dates In Excel inspired you and help you what you are looking for.
“`html
Using Data Validation for Dates in Excel
Data validation in Excel is a powerful feature that allows you to control the type of data entered into a cell. It helps maintain data integrity, reduce errors, and ensure consistency across your spreadsheets. When working with dates, data validation can be particularly useful. You can restrict date entries to a specific range, ensure dates fall within a certain timeframe, or prevent invalid date formats from being entered. This guide will walk you through the process of using data validation for dates in Excel, covering various scenarios and techniques.
Setting Up Basic Date Validation
The most common use of date validation is to restrict entries to a specific date range. Here’s how to set it up:
- Select the Cell(s): Begin by selecting the cell or range of cells where you want to apply the date validation.
- Access Data Validation: Go to the “Data” tab on the Excel ribbon. In the “Data Tools” group, click on “Data Validation.” This will open the Data Validation dialog box.
- Choose Date as the Validation Criteria: In the Data Validation dialog box, go to the “Settings” tab. In the “Allow” dropdown menu, select “Date.”
- Set the Data Restriction: The “Data” dropdown menu allows you to specify the type of date restriction. You have several options:
- Between: Allows dates within a specified start and end date.
- Not Between: Prevents dates within a specified start and end date.
- Equal To: Requires the date to be equal to a specific date.
- Not Equal To: Prevents the date from being equal to a specific date.
- Greater Than: Requires the date to be after a specific date.
- Less Than: Requires the date to be before a specific date.
- Greater Than or Equal To: Requires the date to be on or after a specific date.
- Less Than or Equal To: Requires the date to be on or before a specific date.
- Define Start and End Dates: Depending on the “Data” option you selected, you’ll need to enter the start and end dates. You can directly type the dates in the “Start date” and “End date” fields (e.g., 01/01/2023 and 31/12/2023). Alternatively, you can use cell references by clicking on the cell selection icon next to the date fields and selecting the cells containing the desired dates. Using cell references makes the validation dynamic; if the dates in the referenced cells change, the validation rules will automatically update.
- Customize Input Message (Optional): Go to the “Input Message” tab. Check the “Show input message when cell is selected” box. Enter a title (e.g., “Enter Date”) and an input message (e.g., “Please enter a date between 01/01/2023 and 31/12/2023”). This message will appear when the cell is selected, providing users with guidance on the expected date format and range.
- Customize Error Alert (Optional): Go to the “Error Alert” tab. Check the “Show error alert after invalid data is entered” box. Choose a style for the alert:
- Stop: Prevents the user from entering invalid data. This is the most restrictive option.
- Warning: Warns the user about the invalid data but allows them to proceed if they choose.
- Information: Provides information about the invalid data but allows the user to proceed.
Enter a title (e.g., “Invalid Date”) and an error message (e.g., “The date you entered is not within the allowed range. Please enter a date between 01/01/2023 and 31/12/2023”). This message will appear when a user enters an invalid date.
- Click OK: Click the “OK” button to apply the data validation rules.
Examples of Date Validation Scenarios
- Ensuring Dates are in the Future: To ensure that only future dates are entered, select “Greater Than” in the “Data” dropdown and use the formula `=TODAY()` in the “Start date” field. This will allow only dates after the current date to be entered.
- Validating Dates within the Last Year: To allow dates only within the last year, select “Between” and use the following formulas:
- “Start date”: `=TODAY()-365`
- “End date”: `=TODAY()`
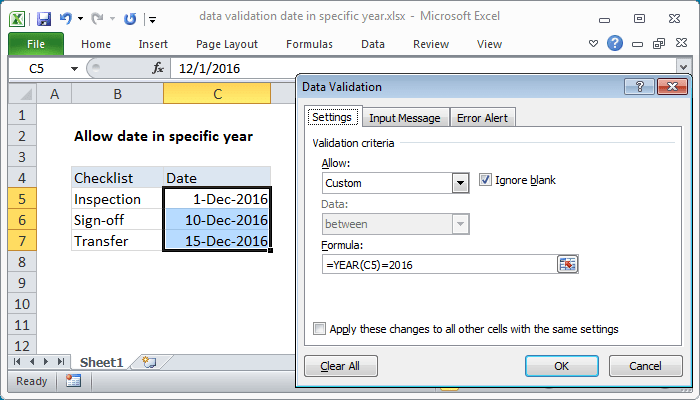
- Restricting Dates to Weekdays Only: This requires a slightly more complex approach using a custom formula. In the “Allow” dropdown, select “Custom”. Then, in the “Formula” field, enter `=WEEKDAY(A1,2)<6` (assuming A1 is the first cell in your selected range). This formula checks if the weekday number (where Monday is 1 and Sunday is 7) is less than 6, effectively allowing only Monday through Friday. Remember to adjust the cell reference if your selected range starts in a different column.
- Validating Dates Based on Another Cell: You can make the validation dynamic by referencing other cells. For example, if cell B1 contains a start date and cell C1 contains an end date, you can set the validation for cell A1 to “Between” with “Start date” as `=B1` and “End date” as `=C1`.
Troubleshooting Date Validation
- Incorrect Date Format: Ensure that the date format you’re using in the validation settings matches the regional settings of the computer. Excel may interpret dates differently based on these settings (e.g., MM/DD/YYYY vs. DD/MM/YYYY).
- Formulas Not Working: Double-check the syntax of your formulas. Ensure that cell references are correct and that you’re using the correct functions.
- Data Validation Not Applied: Make sure you have correctly selected the cells to which you want to apply the validation. Also, ensure that you have clicked “OK” in the Data Validation dialog box to save the settings.
- Circular References: Avoid creating circular references in your formulas. A circular reference occurs when a formula refers to itself, either directly or indirectly. This can lead to errors in your calculations and data validation.
Clearing Data Validation
To remove data validation from a cell or range of cells:
- Select the cell(s) with the data validation you want to remove.
- Go to the “Data” tab and click on “Data Validation.”
- In the Data Validation dialog box, click on the “Clear All” button.
- Click “OK.”
Data validation for dates in Excel is a valuable tool for maintaining data quality and preventing errors. By understanding the different options and techniques available, you can effectively control the type of date information entered into your spreadsheets, ensuring accuracy and consistency.
“`
 700×400 data validation formula examples exceljet from exceljet.net
 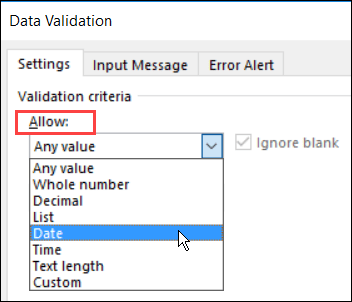 352×302 excel data validation entering from www.contextures.com
  800×600 data validation excel customguide from www.customguide.com
  1333×1000 understanding excel data validation rockets marketing from 500rockets.io
 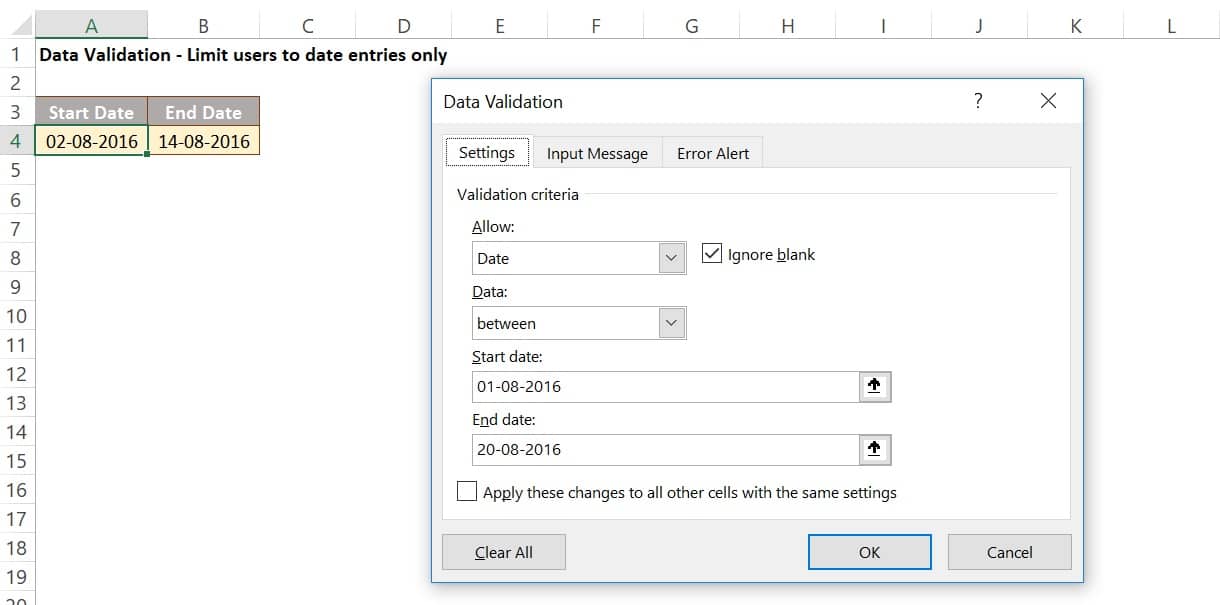 1220×605 data validation excel awesome excel data from datawitzz.com
  641×383 data validation excel examples create data validation from www.educba.com
 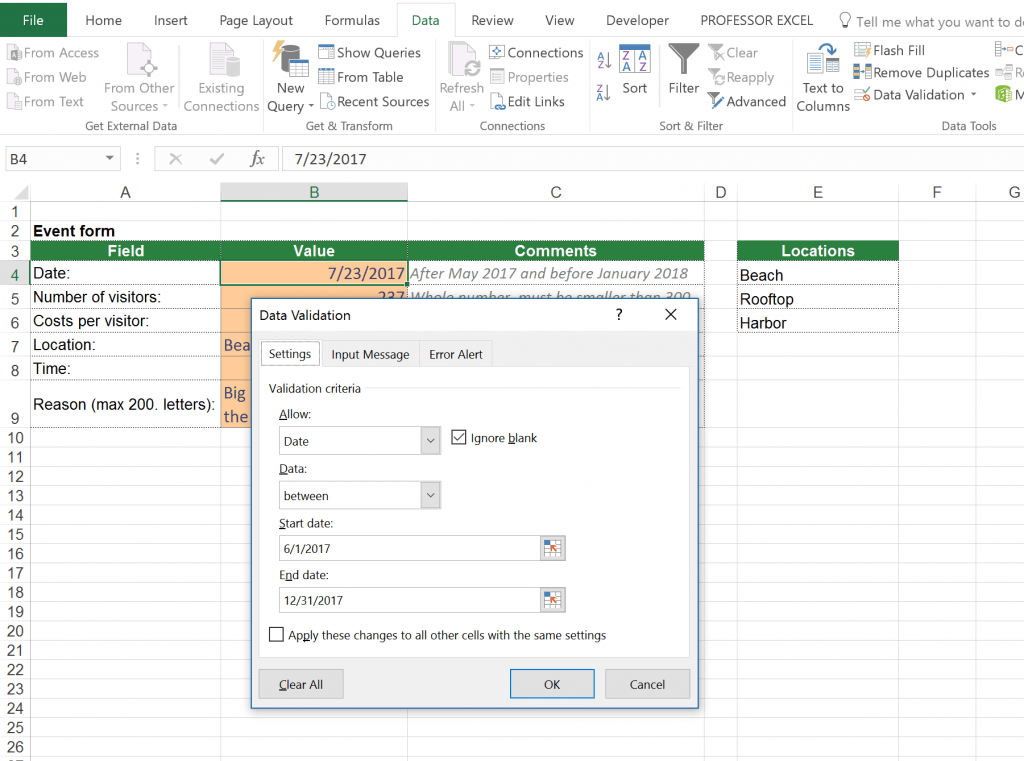 1024×761 data validation excel from professor-excel.com
 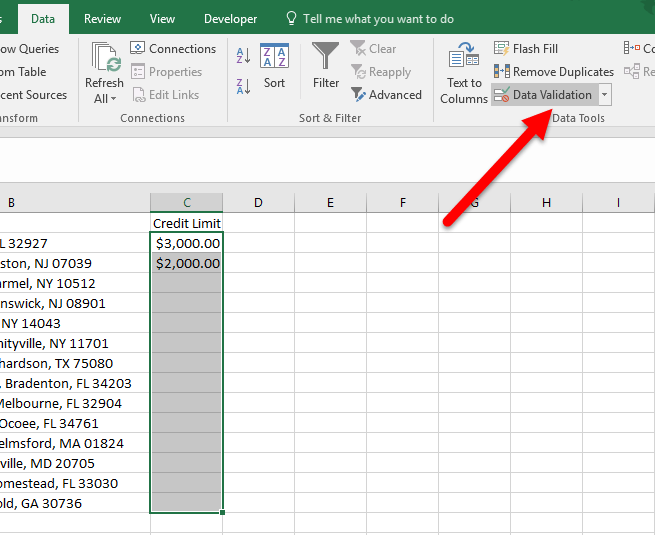 655×535 learn excel data validation cells theapptimes from theapptimes.com
 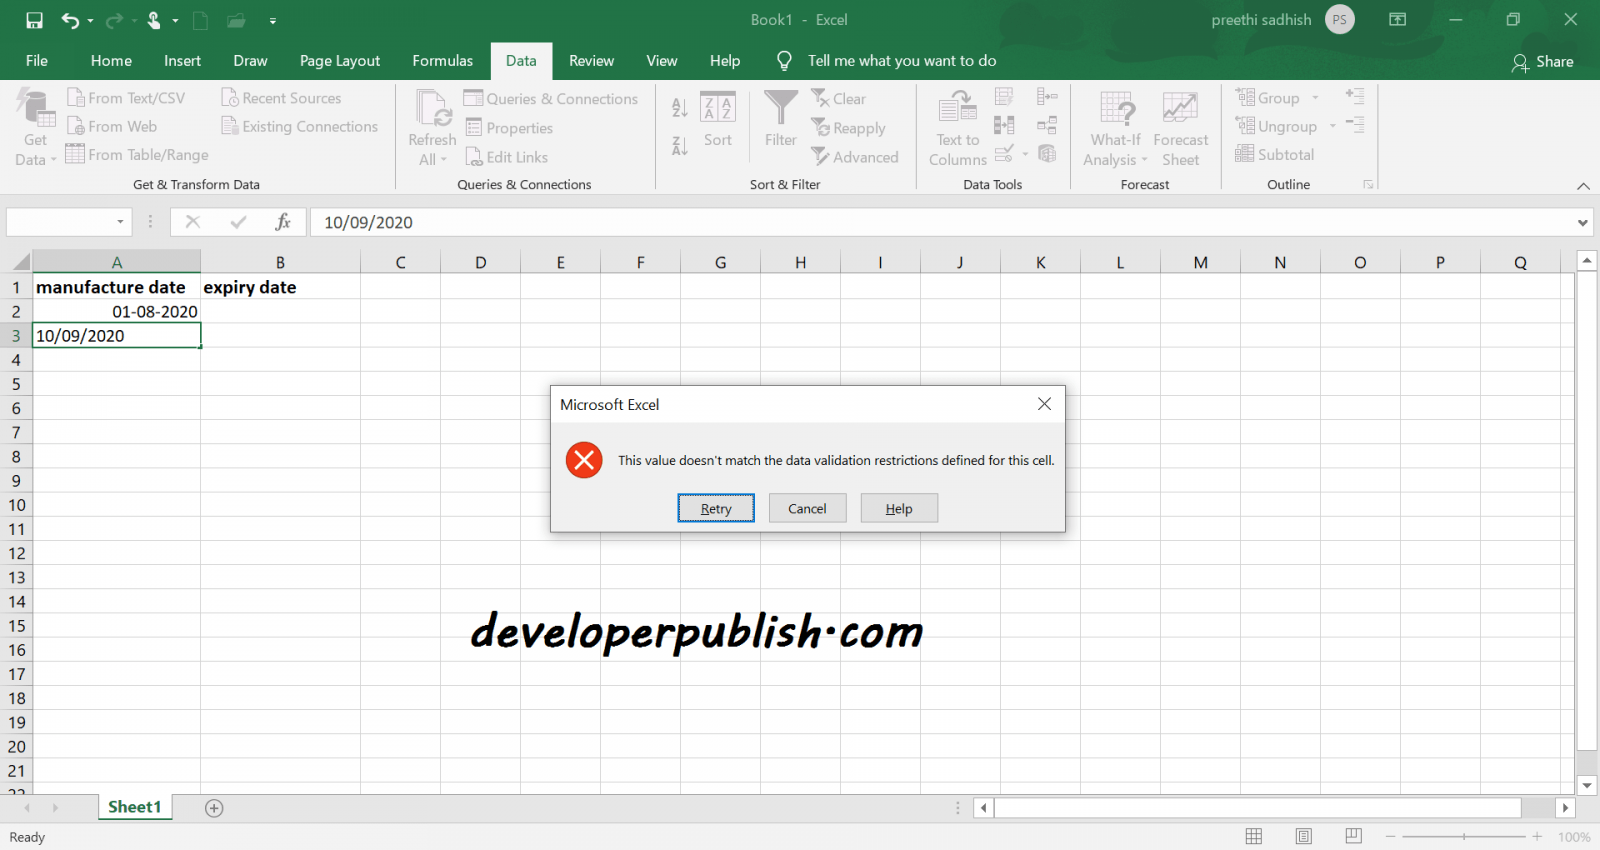 1600×850 date validation microsoft excel developer publish from developerpublish.com
 How To Use Data Validation For Dates In Excel was posted in December 11, 2025 at 7:06 am. If you wanna have it as yours, please click the Pictures and you will go to click right mouse then Save Image As and Click Save and download the How To Use Data Validation For Dates In Excel Picture.. Don’t forget to share this picture with others via Facebook, Twitter, Pinterest or other social medias! we do hope you'll get inspired by ExcelKayra... Thanks again! If you have any DMCA issues on this post, please contact us!